
Customizing any Ubuntu 18.04 based system with the high performance XanMod kernel isn't anywhere near as difficult as it is time consuming. In this article, we'll go over each step of the process in detail so that even beginners should be able to do it fairly easily.
Want to say thanks for an ad-free, subscription free experience and top-notch content?
The backstory
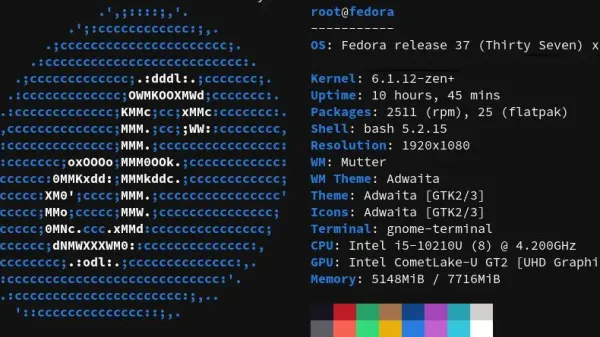
I recently decided to custom build a PC with my daughter to teach her more about the individual components of a computer and how they work. I wanted her to get hands on with the operating system as well, so I decided to install Zorin 15.1 Ultimate on our newly built ITX system and then custom build the XanMod kernel on it with her so she could get some scripting experience using the terminal.
Installing common XanMod Prerequisites
Before you can install XanMod, you'll need to make sure you have all of the prerequisites components installed as well. While this list isn't exhaustive, it covers the repositories and applications you'll need to get your custom kernel running on an out-of-box installation of Ubuntu 18.04.
This tutorial assumes that you have the basic skills necessary to download a Ubuntu 18.04 based distro, format it to some sort of bootable media, and install it on a drive. If this is not the case, I would highly recommend not attempting any of this until you get that behind your belt and firmly inside your comfort zone. Vague familiarity with how to use terminal will be a major asset to you here as well.
Update Ubuntu
sudo apt-get updateAdd the latest PPA test build to your system
sudo add-apt-repository ppa:ubuntu-toolchain-r/testInstall ncurses library
In order for menuconfig to work later on, we'll need to install the latest version of the ncurses library. The gnu version of ncruses is pretty old, but will still work just swell for this purpose.
If you want to skip the manual compiling steps outlined below and grab the trusty version 5 of the library with advanced packaging tool, you can simply run sudo apt-get install libncurses5-dev libncursesw5-dev.
Otherwise:
#Grab the latest ncurses build. As of the time of writing this article, this is 6.1
wget https://ftp.gnu.org/pub/gnu/ncurses/ncurses-6.1.tar.gz
#Extract the file you just downloaded
tar xzf ncurses-6.1.tar.gz#Navigate to the directory of the files you just extracted
cd ncurses-6.1#Configure things
./configure --prefix=/opt/ncurses#install it [heck yeah!]
make && sudo make install#Validate the installation
$ ls -la /opt/ncursesInstall Git
We're going to use git to clone the source files for our custom kernel so you'll need to install git if you don't already have it.
sudo apt install gitInstall and Configure the latest version of GNU Compiler Collection (GCC)
First, let's find out what version of GCC is running:
gcc -vIf your version is older than 9.2, which is the latest release as of the time of writing this article, I highly recommend that you install the current stable version. You can check to see what the latest build is here and then modify gcc-9 and g++-9 in the script below to match the latest version. For example, if the latest version is GCC 11, you would change the values to gcc-11 and g++-11. If the latest build is 12.2, you'd change the values to gcc-12 and g++-12. Note: you do not need to add the number after the decimal (i.e. 9.2, 10.4, etc).
sudo apt-get install build-essential bison flex gcc-9 g++-9Next, we'll need to configure the version of GCC that we just installed to be used by the OS using update-alternatives. To do this, we'll use the script below, also taking care to update gcc-9 and g++-9 to the version you installed above using the previously discussed methodology (if applicable).
sudo update-alternatives --install /usr/bin/gcc gcc /usr/bin/gcc-9 800 --slave /usr/bin/g++ g++ /usr/bin/g++-9
sudo update-alternatives --config gcc
Get your CPU model name, core count, and thread count
Next, we're going to run the following command to grab some information we're going to need later on to successfully configure our XanMod kernel:
lscpu | grep -w "Model name:\|^CPU(s):\|Thread(s) per core:"Be sure to take note of the lscpu output as you'll definitely need it shortly. You'll need to do some basic math here as well to get your thread count since the output will only give you the number of threads per core, not the thread total. To get the total thread count simply multiply the number of cores by the number of threads per core. For example, I have 8 cores and 2 threads per core, so I muliply 8x2 and know that I have 16 threads in total.
Clone XanMod via Git
Next, we'll use the following command to clone XanMod. In this instance, I'm grabbing the latest stable release which is currently 5.5. Please check the XanMod website to verify the latest version and modify the version number (if applicable):
git clone https://github.com/xanmod/linux.git xanmod --branch 5.5With XanMod downloaded, we'll need to navigate to the folder we just extracted that the kernel files now live in:
cd xanmodBehold, the Kernel configuration GUI
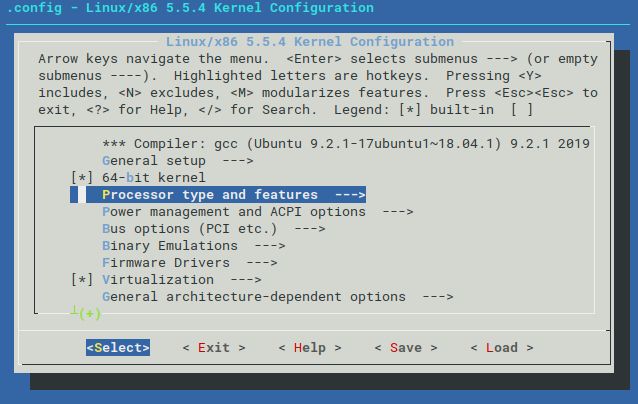
Things are about to get exciting as we evoke the GNU Compiler Collection configuration menu. To do this, we'll run the following command:
make menuconfigHelpful tip: -if- you think there's any chance you may have compiled and configured XanMod previously, or if you're unsure, it's worth running the following command to recompile before proceeding:
make cleanKernel configuration
In this step, we'll need to remove as many unneeded drivers as possible from the kernel we're compiling. As a general rule, the less unneeded stuff we have in our new kernel, the more lean and optimized it will be - unless of course you remove a vital system driver - in that case, you probably won't be able to boot into the OS. But don't let this scare you [too much]. In my experience, the best way to avoid cataclysmic instances is to not to exclude anything that you're hazy on. If you do this, chances are good that you'll be ok.
Legend for configuring the kernel
Before you get started, you'll need to understand each of the possible configuration options and the keys used to set them. This information is actually included in the top area of the kernel configuration GUI, but I figured it might be useful to break it down in tables to provide a nice visual guide:
| [*]/(X) | < M > | ( )/[ ] |
|---|---|---|
| Built-in/Enabled | Auto | Deselected |
The functions that are set/evoked by an associated key are as follows:
| Y | N | M | ? | / | Esc (twice) |
|---|---|---|---|---|---|
| Include | Exclude | Modularize | Help | Search | Exit |
Side note: "modularize" means that you're setting a driver to only be evoked by the kernel if/when needed, whereas, when you exclude a driver it's gone and can't be accessed - period.
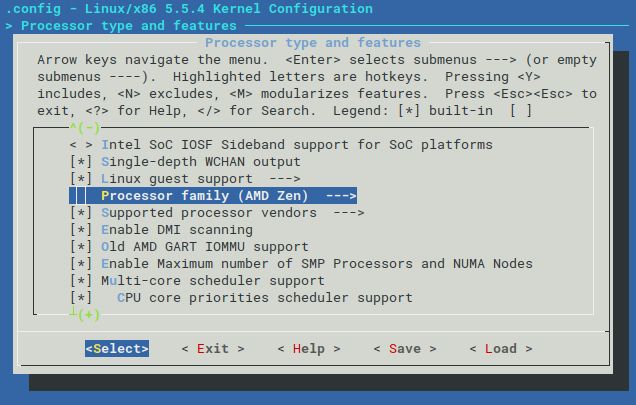
Set your processor family
To get started, from the main navigation, go to Processor type and features -->, Processor Family (XYZ) -->. In the resulting sub-menu, you'll want to choose your exact processor series [if possible]. If your exact processor family isn't listed, go for the nearest neighbor. After setting your CPU, return to the main menu prior to the next step.
Here's a walkthrough of the configuration changes I made at this step:
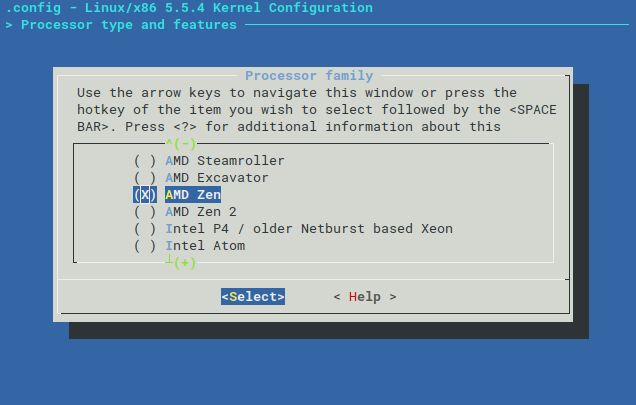
In this instance, my build had an AMD 3400G CPU so I selected AMD Zen. I selected this rather than Zen 2, because AMD's 3000 series desktop iGPU processors happen to be built on the previous 12nm Zen architechture. For any of their 3000 series 7nm chips, you'd want Zen 2 and for any Ryzen chip prior to the 7nm node, you'll want to select Zen.
Banish unneeded display drivers
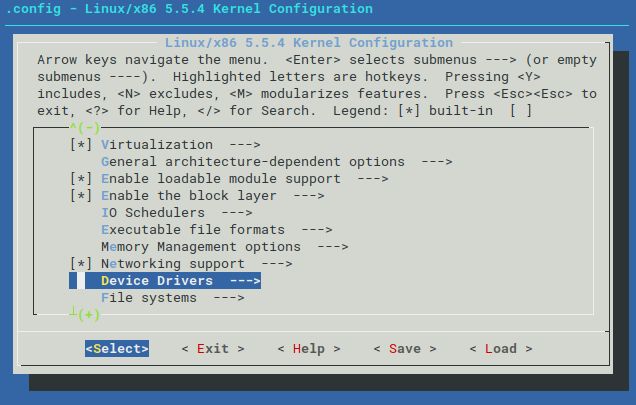
Now is your moment to shine in an epic portrayal of Judge Dread "Kernel Warrior" to any/all unnecessary display drivers. Say to yourself "I am the law" and then navigate to Device Drivers -->, Graphics Support --> to remove anything you've got a good feeling about removing.
Here's a visual walk through of what I did in this step:
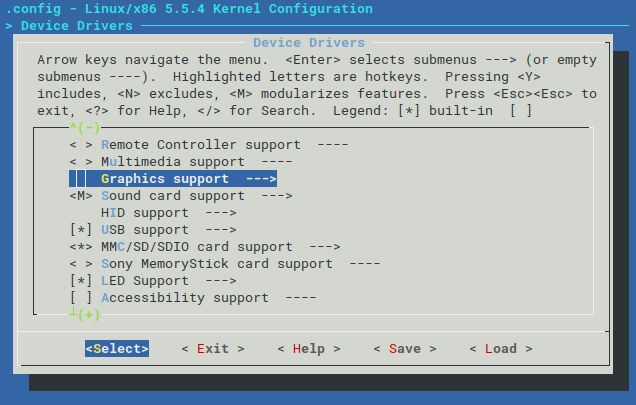
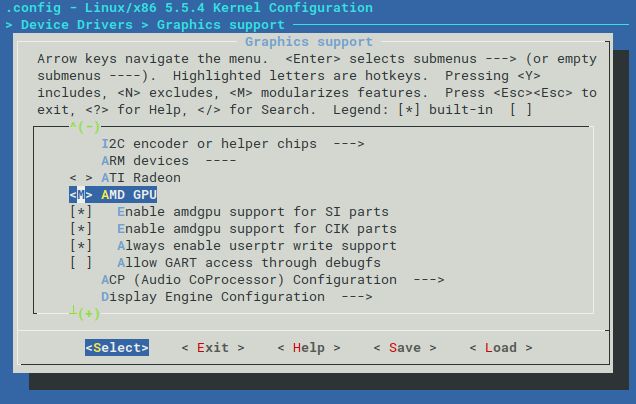
In my case, knowing I have and AMD iGPU, I removed Nvidia and Nouveau without blinking an eye and felt good doing it.
Ask yourself, "am I feeling lucky?"
Well, are you? Because if you are you have two very exciting options available to you. If not though, you have every right to walk away feeling like a real man/woman/person/thing/wombat right now. However, if you're hungry for more there are paths for you to take:
- The quick, easy path that has as much potential to be disasterous as it does glorious. If you're feeling extra specially adventurous, consider letting the GUI prompts rapidly guide you through disabling of components en masse. To do this, you'll run the following command:
make localmodconfig- The slightly more time intensive path is to continue disabling drivers you are confident you don't need. For example, if you have a non-touch device, you could safely disable touchscreen and tablet drivers from running. If you don't have any legacy joysticks laying around that you plan to use, you could also disable that.
Let the XanMod magic begin!
Here's where the CPU information you output earlier comes into play! Before proceeding to compile your custom installable XanMod .deb file, you'll need to modify the script below to match the number of threads your processor has. In this instance, I have 16 threads. -J followed by a numeric value specifies the number of threads. I added 16 after it giving because my processor has 16 threads, resulting in the -j16 value you see below. If your CPU has 8 threads, you would change -j16 to -j8, if your CPU has 32 threads - change it to --j32, etc.
make -j16 deb-pkg LOCALVERSION=-customOnce you run the command above, expect to wait a very, very long time for the compiling to finish. I recommend making popcorn and binge watching your favorite TV series during this time.
Once that's done, it's time to execute our installation file with the following command:
sudo dpkg -i ../linux-headers*.deb ../linux-image*.debAssuming everything went according to plan, reboot and you're done!
Note: If everything didn't go as planned, revert to the previous working kernel, rinse and repeat.